Trane AC Installation Step-by-Step Guide
If you’re looking for a comprehensive and efficient way to install your Trane air conditioning unit, you’ve come to the right place! Installing a Trane air conditioning unit can be tricky, but with the right precautions, knowledge, and tools, you can ensure an optimized cooling system for your home or business. This guide will provide you with step-by-step instructions on how to install your Trane air conditioning system quickly and efficiently.
Pre-Installation Preparations
Before you start the installation process, it’s important to understand the necessary preparations required. Properly equipping yourself prior to installation can help make the process go more smoothly, and reduce the chances of making costly mistakes. Make sure to have the following tools and safety supplies ready:
- Safety goggles
- Work gloves
- Voltage meter
- Screwdriver
- Flathead and Phillips head screwdrivers
- Level
- Pliers
- Wire cutters
- Thread seal tape
- Copper tubing and fittings
You may also want to check to make sure your AC unit is certified and compliant with local regulations. Also check with your local government to ensure that proper permits are acquired prior to installation. Additionally, make sure the unit is properly connected to the power source.
Installation Process
Once you have the right tools in hand, follow these steps to make sure your Trane AC unit is properly installed.
Step 1: Choose an Ideal Location
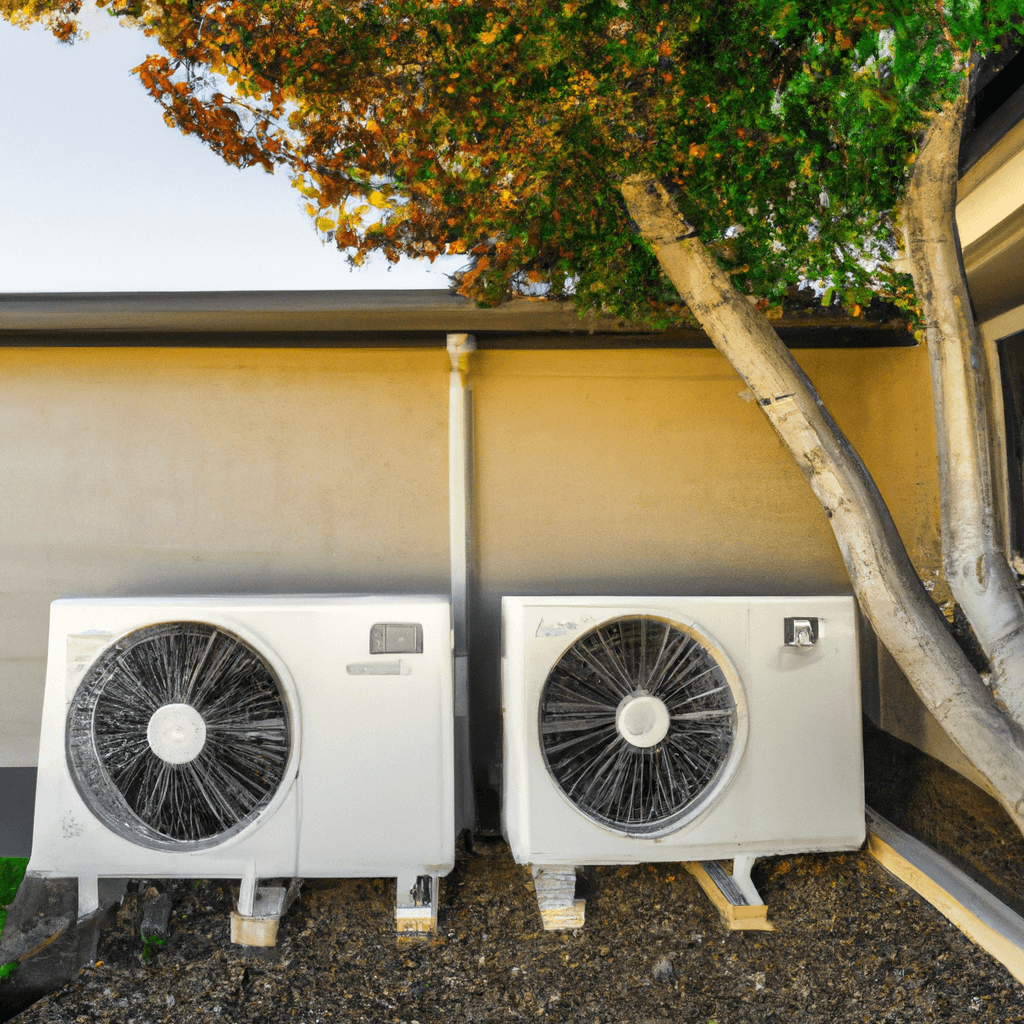
The location of your AC unit is key to making sure it functions optimally and efficiently. When deciding on a location, make sure to choose an area that’s flat and away from any obstructions. It’s also important to make sure the area is well ventilated and has enough clearance. Consider the direction of the airflow to help optimize the cooling capacity and reduce the noise level of the unit.
Step 2: Install the Bracket and Unit
Begin by mounting the bracket onto the wall. Make sure it’s securely attached. Next, mount the unit onto the bracket. Make sure to check the level of the unit with a level tool and tighten the screws accordingly.
Step 3: Attach the Copper Coolant Line
Attach the two flexible lines coming from the unit onto the respective pipes for the coolant line. Make sure that you don’t kink the line and that it maintains the right angle. Seal the connections with thread seal tape and hand tighten the connections.
Step 4: Connect the Power Supply
Disclaimer: Electrical work should only be entrusted to a qualified professional electrician.
Using the power supply running to your unit, gently attach it to the terminals. Make sure that all safety protocols are followed and that proper voltage readings are obtained.
Step 5: Connect the Drain Line
Connect the drain line to the condensate pump or the drain line itself. Use the same procedure mentioned in step 3 and make sure that it’s adjacent to the wall.
Step 6: Check for Leaks and Test the Unit
It’s important to check for any possible signs of leaks in the unit. Make sure to check for leaks in the coolant and drain lines. Once you’re sure the unit is sealed properly, go ahead and turn the unit on. Test for proper performance.
If you’re still having trouble installing your Trane AC unit, don’t worry! Local Reliable Appliance Repair can provide you with expert installation services. With decades of experience and a trained staff of technicians, you can rest assured that your Trane AC unit is in the right hands. Call them today at (866) 311-8590 to get your Trane AC installed.


Trane AC Installation Instructions: Best Practices for Installers
When installing a Trane AC unit, it’s important to follow manufacturer and technician recommendations to ensure a successful and safe installation. It’s also essential to take preventive action to avoid any potential issues. Below are some of the best practices to consider when installing a Trane AC unit.
Utilize Professional Services
The best way to receive a proper and safe installation of your Trane AC unit is to utilize the services of a local, reliable air conditioning and heating installer. Professional installers are well-versed in the proper procedures of installing a Trane AC unit, so they can ensure that all parts and wires are connected accurately and securely. Hiring a professional installer can also relieve the burden of having to do the installation yourself, saving you time, energy, and money in the long run.
Familiarize Yourself with Owner’s Manual
Every Trane AC unit comes with an owner’s manual that is packed with valuable information and instructions. Before starting the installation process, it’s important to sit down and read the manual to make sure that you fully understand all the instructions and safety recommendations. Reading the instructions will also help you become familiar with the names and functions of all the components, which can be especially helpful if you are tackling the installation yourself.
Inspect ALL Parts Before Installation
Before you begin, it’s important to inspect all the parts and components that came with the AC unit for any potential damage. This will include checking the coils, wiring, mounting brackets, evaporator and condenser fan motor, and other related parts. If any of the parts or components are damaged or faulty, they should be replaced before you begin the installation process.
Verify Proper Power Requirements
Before installing the AC unit, be sure to check the power requirements of the unit and verify if the electrical panel is rated to meet such requirements. If the electrical panel is not rated accordingly, then you should consult a professional electrician to upgrade the electrical system.
Prepare Mounting Area
Once all the components are ready, the next step is to prepare the area where the unit will be mounted. This will involve making sure that the ground is level and that all the mounting holes are aligned properly and positioned on the wall. It’s also important to make sure that the mounting area is clear from any debris or furniture, as well as to consider the airflow in the area (e.g., any potential obstructions to the airflow).
Secure and Tighten Connections
As you begin the installation process, it’s important to make sure that all the wires and connections are secure and tight. Inadequate tightening of the connections can cause damage to the AC unit, while not following manufacturer recommendations can put you at risk of an electric shock.
Test AC Unit After Installation
Once all the installation is complete, it’s essential to test the AC unit to make sure that it’s operating correctly. Test the unit by turning it on, running it for a short period of time, and making sure that the unit is cooling the room effectively. If the unit does not operate properly, then you should contact a professional for assistance in resolving any potential issues.
By following these best practices, you can ensure that your Trane AC unit is installed correctly, safely, and efficiently. By taking proper precautions and familiarizing yourself with the owner’s manual, you can reduce the likelihood of any potential issues and maximize the lifespan of your AC unit.
Steps to Repair and Installation Cost For Trane AC
Calculating the repair and installation cost for a Trane AC unit may seem daunting, but it is important to ensure a professional job is done correctly. To provide the best advice on repair and installation costs, here are some items that should be itemized and understood:
-
Minimum repair/installation cost: The minimum repair/installation cost for a Trane AC will likely increase 20% from the standard rate due to the complexity of the installation. Additional fees may be incurred if materials and tools are required for the job.
-
Cost of the materials: The cost of the materials can vary depending on the region, but necessary items typically include a wiring harness, mounting brackets, and a seal. Prices for these items can start as low as a few dollars and go up from there depending on make and model.
-
Cost of the labor: This will depend on the complexity of the installation and the region. It is often best to ask a reliable source, such as Local Reliable Air Conditioning & Heating at (866) 311-8590, for an estimate.
It is important to keep in mind that the cost of the materials and labor are only a fraction of the overall cost. Expenses such as taxes, permits, and permits will add to the overall cost of repair or installation.
In summary, the cost of repair or installation for a Trane AC unit can vary based on the region, complexity, and the type of materials required. In addition, additional fees such as taxes and permits should be factored into the budget. Contacting a dependable source, such as Local Reliable Air Conditioning & Heating at (866-311-8590) can help ensure that repairs and installations are done right the first time.
Installing A Trane AC Unit with Reliable Air Conditioning & Heating
Reliable Air Conditioning & Heating is a family-owned, California-based, appliance and HVAC repair and installation company. All of their highly-trained technicians have, at least, 5 years of service experience in the field. They specialize in Trane AC installation instructions, offering quick and reliable same-day services with a 90-day warranty.
The installation process is straightforward and is carefully handled by their professionals. First, they will evaluate the area and measure the dimensions for the installation. They use high-quality components for the installation and provide instructions for further maintenance and operation of the unit either orally or in printed form.
Reliable Air Conditioning & Heating provides convenient and cost-effective services and will make sure the AC unit is working perfectly once the installation is complete. Plus, their technicians also provide tips on how to use the AC unit efficiently and save energy while making sure it provides optimal climate control.
Reliable Air Conditioning & Heating’s trained technicians are expert in following Trane AC installation instructions and making sure they are installed correctly and safely. You’ll be sure you’re receiving the best care and service with the company, and you can leave all the hard work to the professionals.
Overall, Reliable Air Conditioning & Heating is the best option for all your AC needs. Highly experienced personnel, same-day service, fair prices, licensed and insured technicians, and a 90-day warranty makes them the go-to option for Trane AC installation instructions.
FAQ: Trane AC Installation Step-by-Step Guide and Instructions
What is required for Trane AC installation?
Installing a Trane AC system requires a permit and a professional HVAC technician to size, configure, and install the system. The installation will have to be done in compliance with the pre-set local codes and regulations.
How do I prepare for installation?
Prior to installation, the area should be measured and checked to ensure enough clearance is available for the unit. Make sure the space is well-ventilated and that there is enough clearance (aside from all building codes). Prepare the space for the cords and other components of the system before the installation process begins.
What are the steps involved in a Trane AC installation?
Trane AC installation typically involves the following steps:
– Location assessment and inspection
– Pipe connection and conduit wirings
– Electrical connection
– Refrigerant charge
– Evacuation and testing
– Final inspections
What are the safety precautions involved in the installation of a Trane AC system?
- Disconnect the power supply before beginning the installation
- Wear protective gear, including gloves, eye protection, and a face mask
- Make sure all doors/panels at the site aren’t removed or disturbed during the process
- Follow all safety instructions as outlined in the user manual
Can I install a Trane AC unit myself?
For the safety of yourself and your Trane AC unit, it is not recommended to install the unit yourself. Only an experienced and qualified professional should carry out the installation of your Trane AC system.
If you are looking for a reliable and professional appliance repair company to help with your Trane AC system installation, please call Local Reliable Appliance Repair at (866) 311-8590.