
Your Mini Split AC Installation can be a daunting task. With the help of a professional, you can easily complete the installation and avoid any costly repairs that can occur due to improper installation. This article provides a step-by-step tutorial video on how to properly install your mini split AC system.
Introduction to Mini Split AC Installation Video Tutorial
Mini split AC systems are the most popular modern cooling and heating options for residential and commercial buildings. They are extremely efficient, quiet, and can provide exceptional comfort without relying on traditional ductwork systems. Installing a mini split AC system requires a certain level of technical savvy and expertise, so it’s recommended to contact a qualified local appliance repair specialist for any installation needs.
Mini split AC installation is not a job to be taken lightly. If not done properly, some common problems include poor indoor air quality, leaking condensate, increased noise levels, or even worse, cooling/heating problems due to incorrect or incompatible sized equipment. Installing a mini split AC unit is also a great DIY project for the homeowner who wants to save money and are comfortable tackling the job themselves.
What Potential Issues to Expect During Mini Split AC Installation?
Mini split AC systems require the ducts and ventilation to be perfectly aligned and sized. A lack of knowledge and experience can lead to incorrect installation that could cause air to leak from the system, meaning it’s less efficient and will cost you more money in the long run. Poorly installed systems can also lead to problems with noise and vibration, making it uncomfortable for those inside the home. Furthermore, incorrect wiring can lead to safety hazards and costly repairs.
When installing a mini split AC system, it’s important to consider what type of tools and materials you need ahead of time. This will save time and make the job much easier in the end. Generally, a mini split AC installation requires the following materials: copper piping, fittings, electrical wiring, copper pipe insulation, outdoor unit support frame, and an outdoor power unit.
Step-by-Step Mini Split AC Installation Video Tutorial
Installing a mini split AC system is a complex project and requires the skill of a professional appliance repairman or licensed contractor. However, if you feel comfortable taking on the task, there are some aspects of the installation where you can do it yourself. Here is a step-by-step Mini split AC installation video tutorial to help you with the process:
Step 1: Plan Ahead for Mini Split AC Installation
Before you begin your mini split installation, you should familiarize yourself with the layout of the area where the mini split AC will be installed. Obtaining professional drawings of the space will help ensure that your plan is as accurate as possible. Additionally, identify where the return air and supply air vents will be placed so you can plan your route and understand how the ductwork and grilles will connect with the AC unit itself.
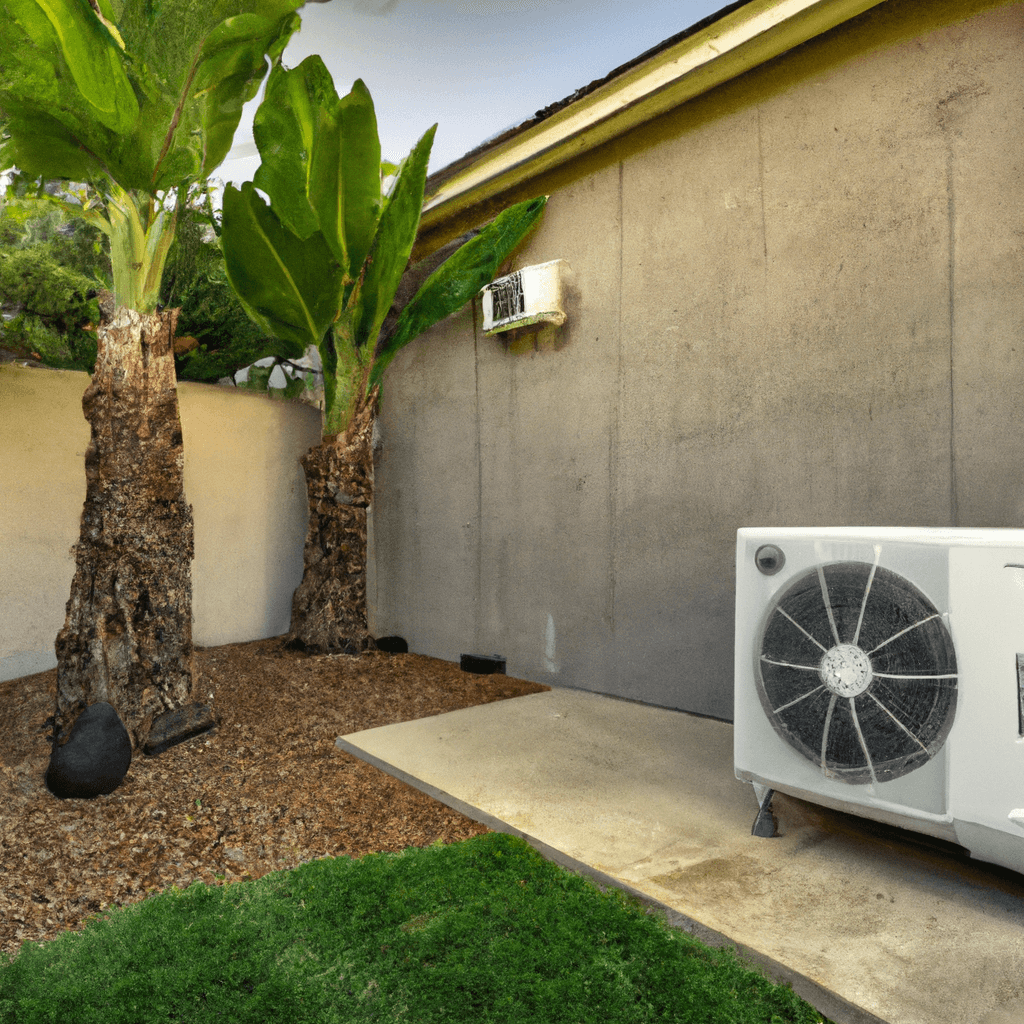
Step 2: Position the Outdoor Unit
Once the drawings have been finalized, the next step is to set up the frame and positioning of the outside AC unit. Ideally, the frame should be set up close to the wall and at least 4-8 inches away from any obstructions or walls. You should always follow all local building codes when positioning the frame, and it is particularly important to consider slope in order to ensure proper drainage of condensate.
Step 3: Connect Refrigerant Line and Electrical Wiring
This step is one of the most importantwhen it comes to the installation of a mini split AC system. Following manufacturer instructions, the refrigerant line and the electrical wiring must be connected in order for the mini split to function properly. It is recommended to hire a professional technician for this step, as incorrect installation can be hazardous.
Step 4: Install Indoor Unit
Once the refrigerant line and wiring have been connected, the next step is to install the indoor unit. Common indoor unit models can be hung from the ceiling, wall-mounted, or floor-mounted. Carefully position the indoor unit ensuring that there is a few inches of space between the unit and any adjoining walls. Once properly set up, use screws to secure the indoor unit in place.
Step 5: Check the Connections and Start the System
After completing the installation, the final step is to check all the connections, double-checking that everything is properly installed. Once all the connections are secure, the indoor and outdoor units should be ready to turn on and start the mini split AC system.
Conclusion
The installation of a mini split AC system can take several hours depending on the complexity of the job. To get the best results, it is important to plan ahead, use the right tools and materials, and contact a local appliance repair specialist for any installation needs. By following a step-by-step mini split AC installation video tutorial and taking the time to complete the job properly, homeowners can be confident that their new system will provide years of efficient cooling.


Mini Split AC Installation Video: Best Practices
Nothing is more frustrating than a malfunctioning air conditioner especially in the sweltering heat of summer. However, with proper guidance and a few preventive measures, many common problems can be avoided before they even arise. When it comes to mini split air conditioning installation video, local appliance companies and HVAC technicians can provide the best advice for avoiding installation issues. Below are the recommendations for preparing for a successful AC installation:
Preparation
Before the installation commences, make sure that the area is prepared for the work. This may include cleaning up debris, clearing extra furniture from the room, and checking that the wiring and connections are all in working order. It’s also important to collect all the parts needed for the installation ahead of time, as certain parts may be difficult to find. Additionally, take the time to carefully read the manufacturer’s installation guide to ensure that all the materials and tools required for the installation are on hand.
Measure Twice, Cut Once
Measuring the space where the air conditioner will be installed is an essential step in the process. Make sure to double-check the measurements against the manufacturer’s guidelines beforehand, since there needs to be enough space for the unit to be fully installed and efficient. Once the measurements match the specification, it is time to begin the installation.
Installation
After taking the proper safety precautions and fully preparing the space, the next step is to do the actual installation. Make sure to carefully follow each step of the instructions and double-check that each step is completed correctly. With proper care and attention to detail, the air conditioner should be functioning correctly when the installation process is complete.
Professional Assistance
If for any reason the installation isn’t working correctly, it is important to seek help from a qualified HVAC professional. It is always important to have a certain level of experience before attempting a DIY installation. If the problem persists, a qualified technician can provide assistance to ensure that the air conditioner is operational and running efficiently.
Maintenance
Finally, it is important to perform regular maintenance on the air conditioner to extend its lifespan. This may involve inspecting and cleaning the air filter regularly, ensuring that all the vent systems are functioning correctly and making sure that any wiring connections are still secure. Depending on the unit, there may be additional maintenance requirements that should be followed, so it’s wise to consult the manufacturer’s instructions or a trusted HVAC expert before performing any maintenance.
By following these recommendations, mini split air conditioning installations can go smoothly and remain free of problems. HVAC technicians and local appliance companies can provide excellent resources and advice to ensure that all installations go as planned. As with any project involving electrical work, safety should always come first. With a few preparations, the right tools, and a healthy dose of caution, any Mini split AC installation video can be a success.
Average Repair Cost for Mini Split AC Installation Video: Advice & Estimate
Courageous homeowners can learn to install a mini split AC system with the help of DIY videos. But it’s best to seek the expertise of a qualified HVAC technician to ensure maximum efficiency and safety.
The average repair cost for a mini split AC installation is influenced by a range of factors. It can vary from a low cost of $400 to $5,000 for more complex installation. Depending on where it’s located, a professional in California can charge up to 20% more to factor in the cost of living and materials.
In many cases, the repair cost covers different parts such as:
* Condenser
* Wall mounted AC unit
* Wiring
* Mounting plate
* Drainage pipe
* Copper tube
* Insulating tape
Your repair cost may also include other fees such as labor and equipment. For instance, extra-long copper tubes may require additional labor and materials costs.
To establish the precise repair cost for your mini split AC installation, contact a reliable local HVAC technician for an inspection. They can also provide an itemized list and an accurate quote.
We recommend Local Reliable Air Conditioning & Heating [(866) 311-8590], an experienced HVAC specialist with competitive rates and quality service. Book an appointment today for an on-site free estimate.
Expert Mini-Split AC Installation Video Tutorial
Do you need your new mini-split air conditioner or heat pump installed quickly and easily? Why not watch a tutorial video and do it yourself? With Reliable Air Conditioning & Heating as your local California provider, you can learn how to install your device in no time.
Reliable Air Conditioning & Heating is a family-owned company that has been serving California for more than 25 years. Boasting an impressive staff made up of highly trained technicians with a minimum 5 years of experience on the field, Reliable is the go-to choice for mini-split installation and repair.
The company offers same-day appointments and Fair and Affordable Pricing, so you won’t have to wait long before getting your mini-split set up. In addition, they are licensed and insured and guarantee same-day service. It’s the ease-of-mind you need when dealing with complicated electronic installations. Furthermore, Reliable offers a 90-Day Warranty on all repairs.
So don’t let the installation process of your mini-split air conditioner or heat pump become an obstacle for you. With the help of Reliable Air Conditioning & Heating, you can save time and money by watching an instructional video and doing it yourself. Let their experts guide you through the installation process and be sure of achieving a high-quality setup. Get the most out of your purchase and enjoy a convenient and comfortable living space at your home.
FAQ about Mini Split AC Installation Video Tutorial and Mini Split AC Installation Video
What is a Mini Split AC?
A mini split air conditioner is an efficient, relatively low-cost air conditioning system that can be used to cool and heat individual rooms. It features two main components: an outdoor compressor/condenser and an indoor air-handling unit.
What are the benefits of installing a mini split AC?
Mini split AC systems are great for providing personalized climate control solutions in homes and businesses. They’re especially useful for rooms that require temperature regulation without having to alter the temperature of the entire house. The lack of ductwork involved in installation also makes them more energy efficient and easier to install.
How can I get a mini split AC installation tutorial video?
Mini split AC installation tutorials are readily available online, with many free and paid video tutorials available. Additionally, many local HVAC companies can provide an installation video.
What are some tips for installing a mini split AC?
There are several important tips for installing a mini split AC: hire an experienced professional for the job, make sure you have the proper tools and materials, make sure the outdoor compressor is placed in an area where it won’t be affected by direct sunlight or harsh weather conditions, properly insulate ducts, and connect all wiring correctly before powering up the unit.
For more detailed advice on mini split AC installation, we recommend checking out local reliable appliance repair services to ensure safe and effective installation. For more information, call Local Reliable Appliance Repair at (866) 311-8590.